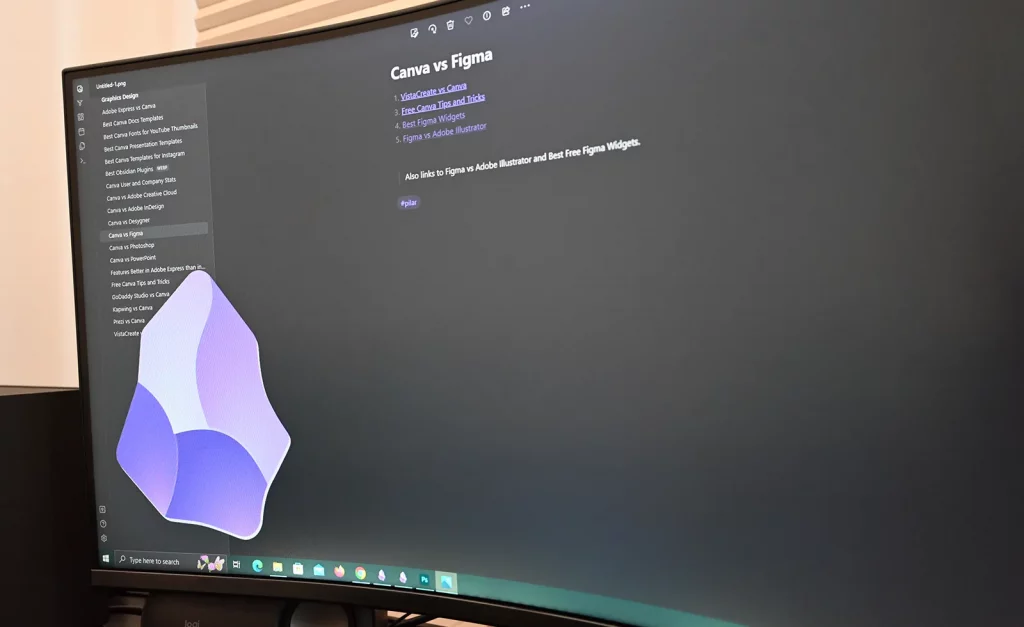
Obsidian Sync is a paid add-on, but there are free ways to sync notes. Those methods require a one-time setup and offer the same experience.
So, how to sync Obsidian for free? This is an in-depth tutorial on how to sync Obsidian Notes across devices.
Note: I’m using OneDrive as an example, but using Dropbox and other platforms is similar.
Windows and Windows (6 steps)
Syncing Obsidian on desktop computers requires the cloud storage (platform) folder. Follow the below steps to sync notes.
Step 01
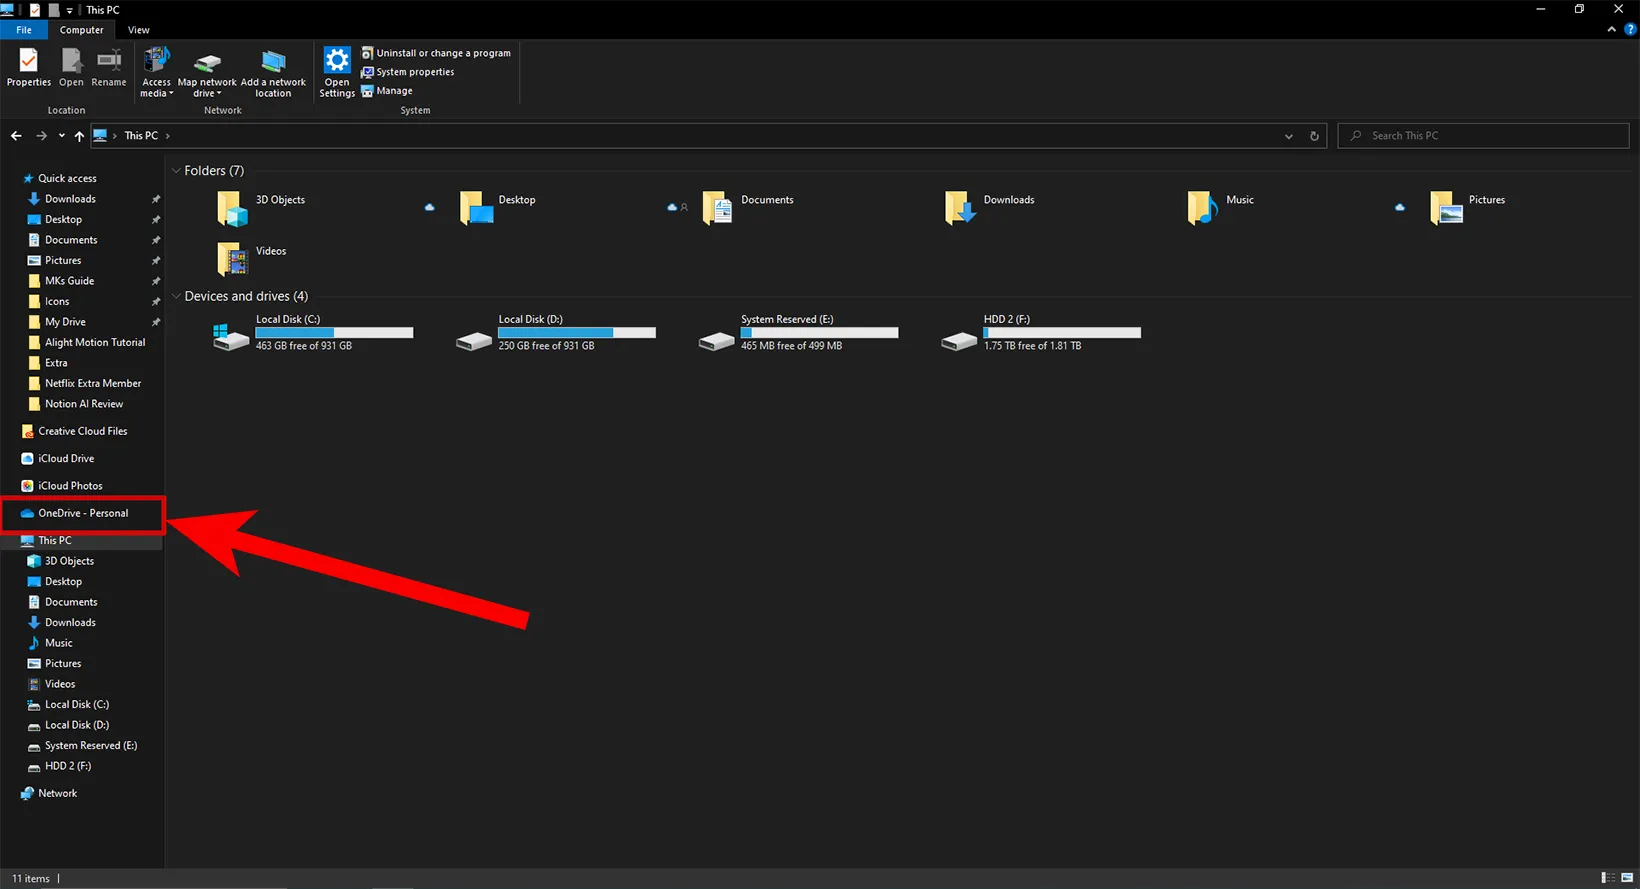
Ensure you have the OneDrive folder or your cloud storage folder in the navigation menu of File Explorer. Check for the same folder on the Macbook.
Install the cloud storage drive on your PC before continuing the process.
Step 02
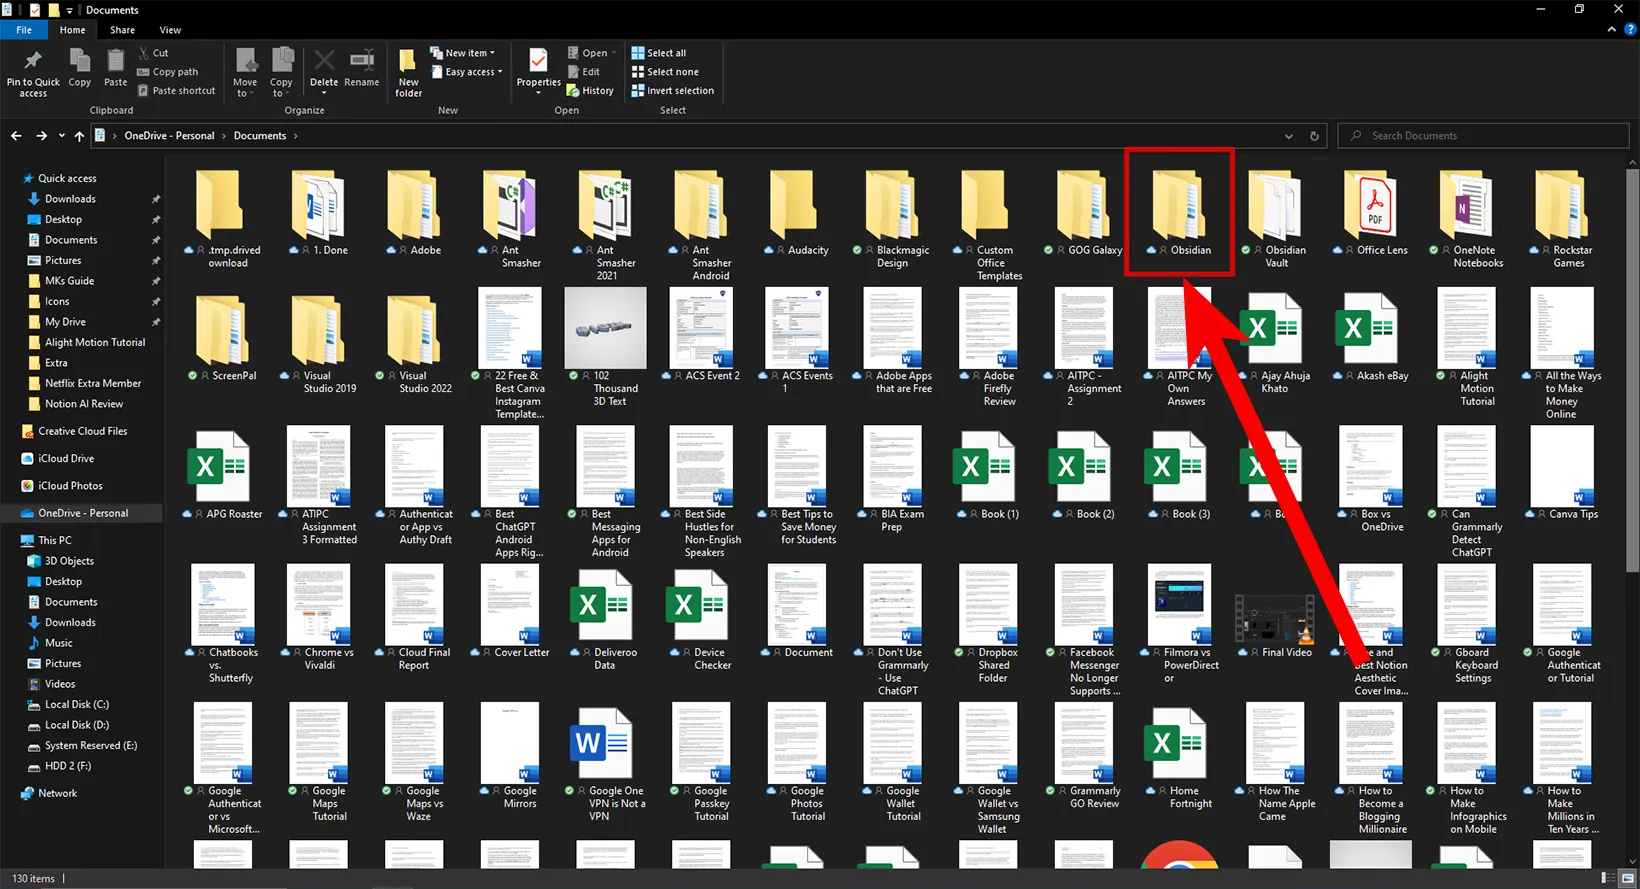
Go to the location where you want to save your notes. Create a new folder named “Obsidian” or something else.
Step 03
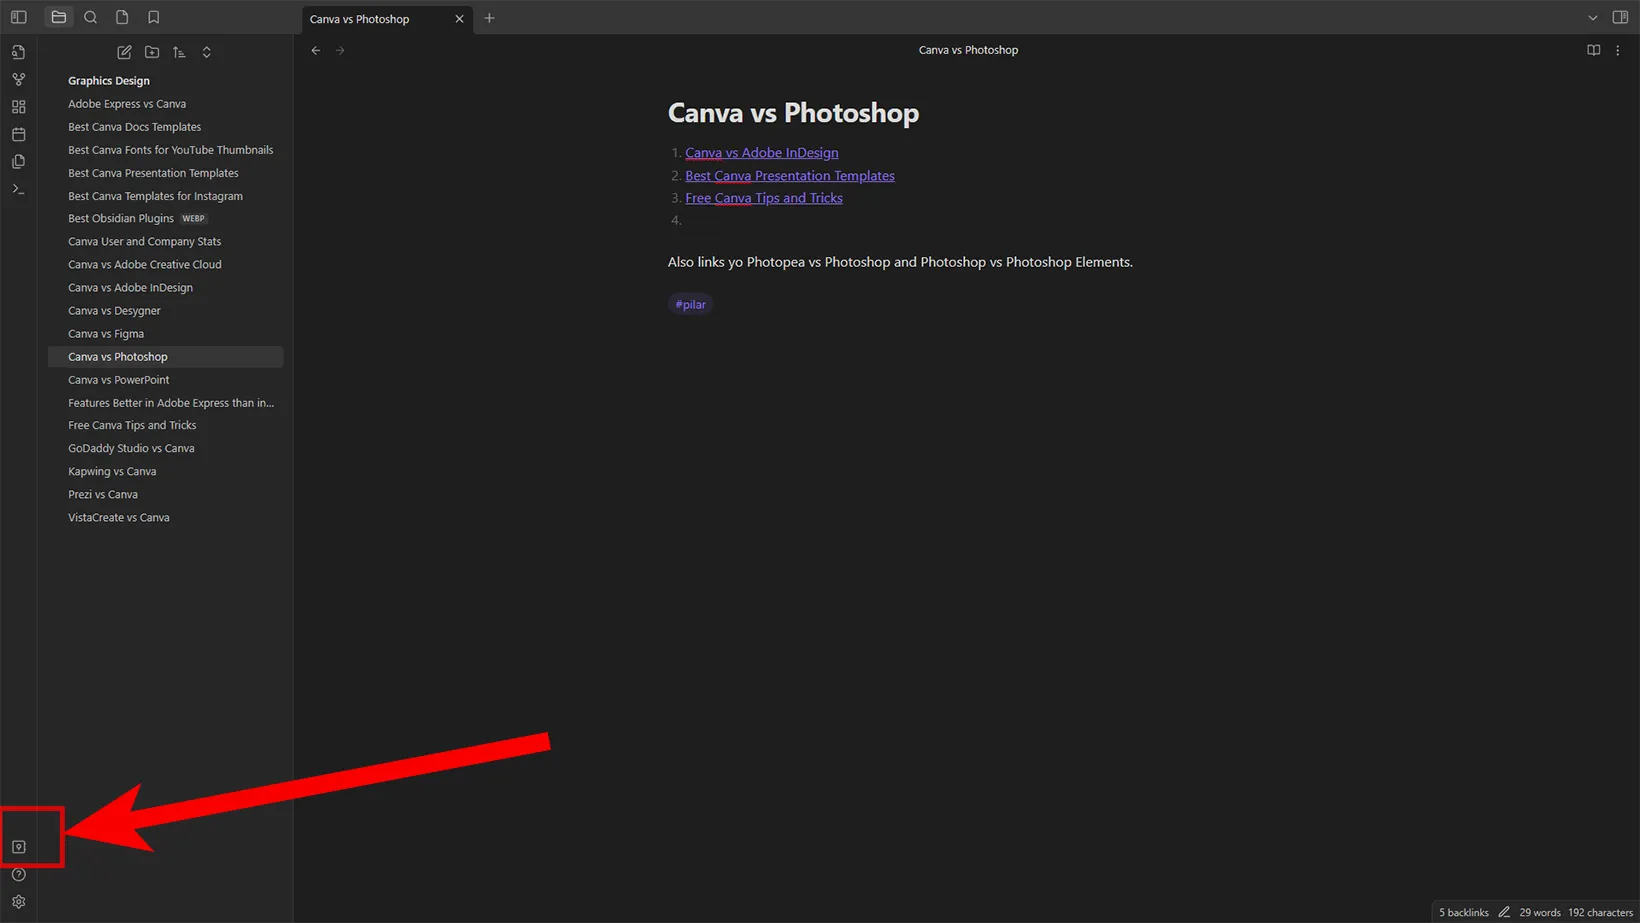
Open Obsidian Notes and click on the “open another vault” button. If this is your first time using Obsidian, the vault menu will open on start-up.
Step 04
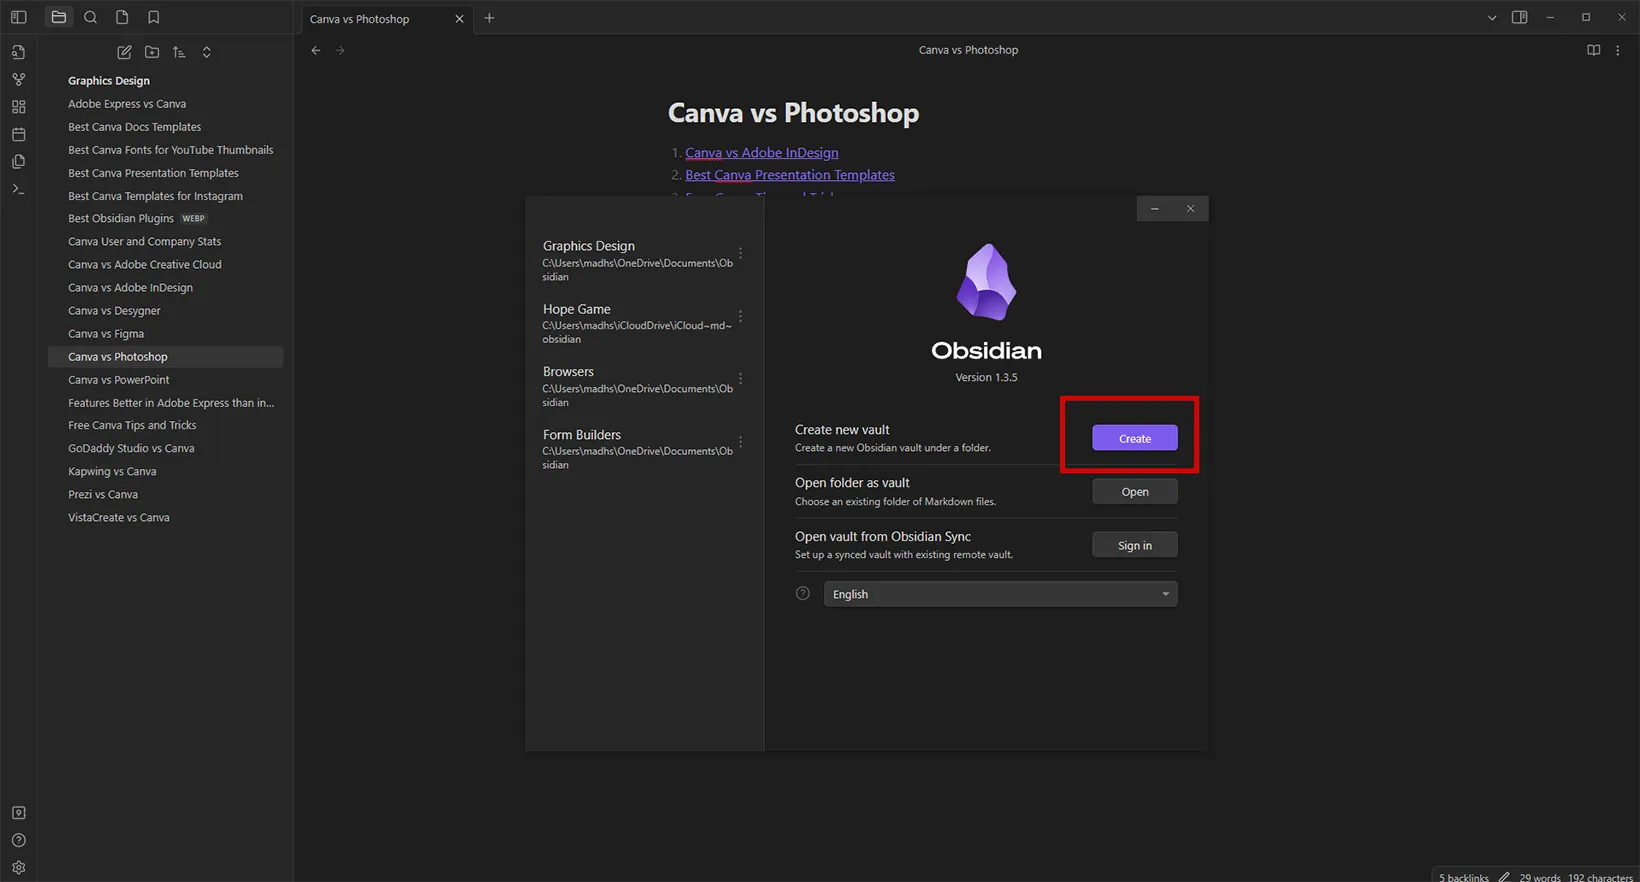
Click the “Create new vault button” and name your project. Click “Browse” and select the “Obsidian” folder from the cloud storage folder. Add notes to your project.
Step 05
Ensure you have the same cloud storage service added to your other computer. You will find the same “Obsidian” folder and the project folder inside it.
Step 06
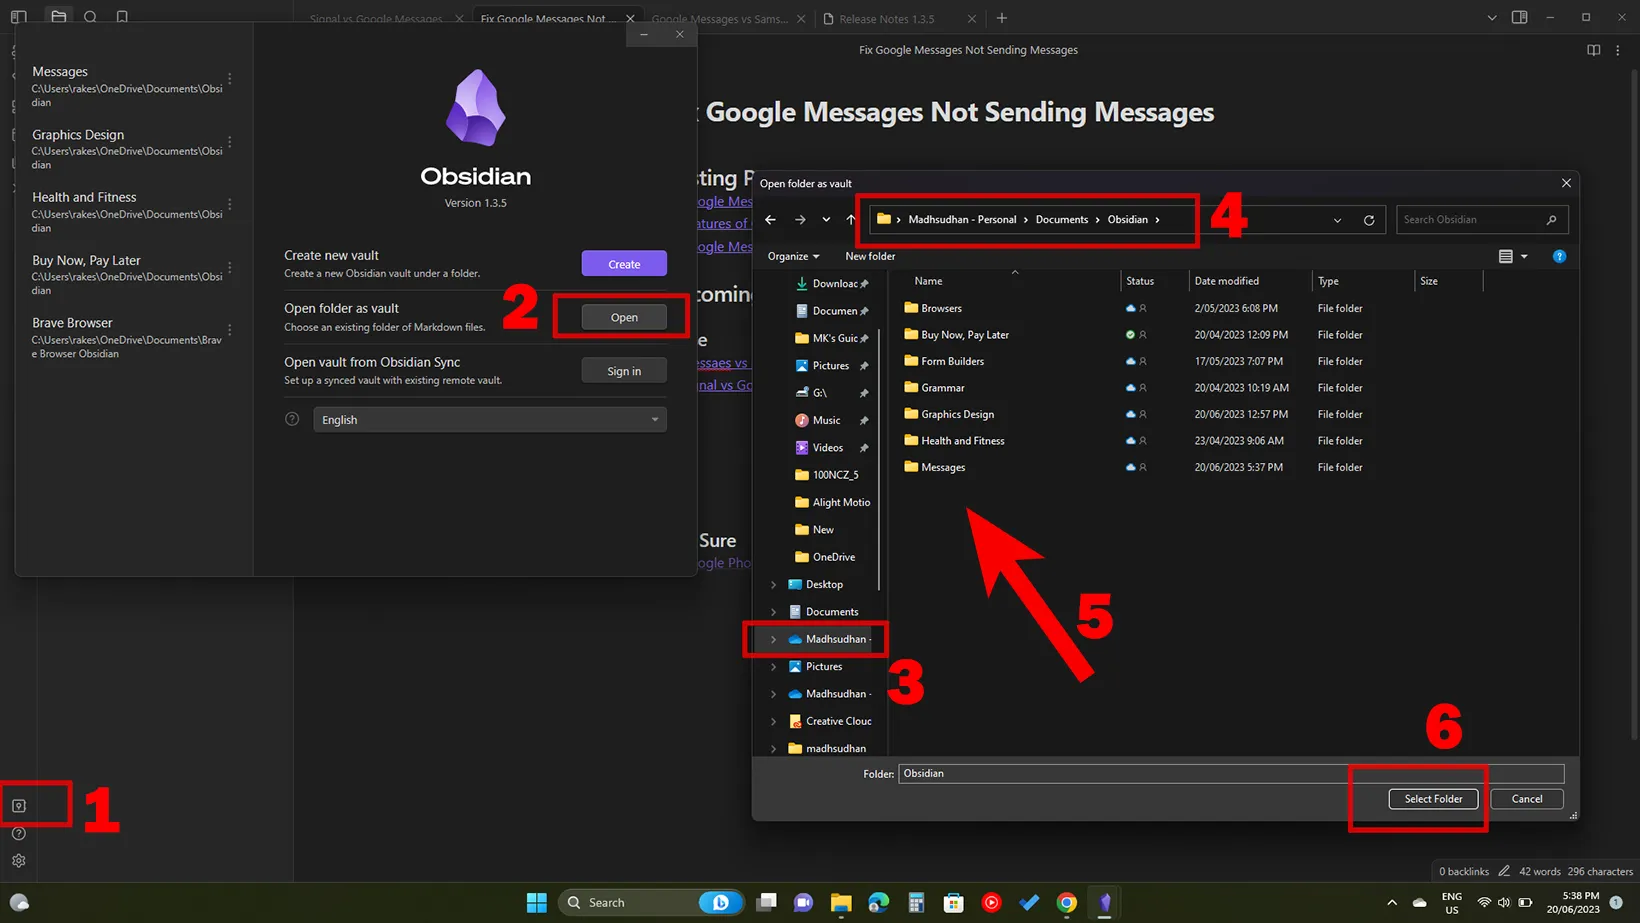
Open Obsidian on your other computer and click the “open another vault” button. Choose the project folder in the “Obsidian” folder in your cloud storage drive. Click on the “Select Folder” button.
Now, you have Obsidian synced on both devices. Editing any files here will automatically update on the other computer.
You can add more projects inside this folder and open them similarly.
While you are here: Obsidian vs. Microsoft OneNote
Windows PC and iOS (7 steps)
To sync Obsidian notes between PC and iOS, we need iCloud Drive. Obsidian does not support OneDrive, Dropbox, and other cloud storage platforms.
Step 01
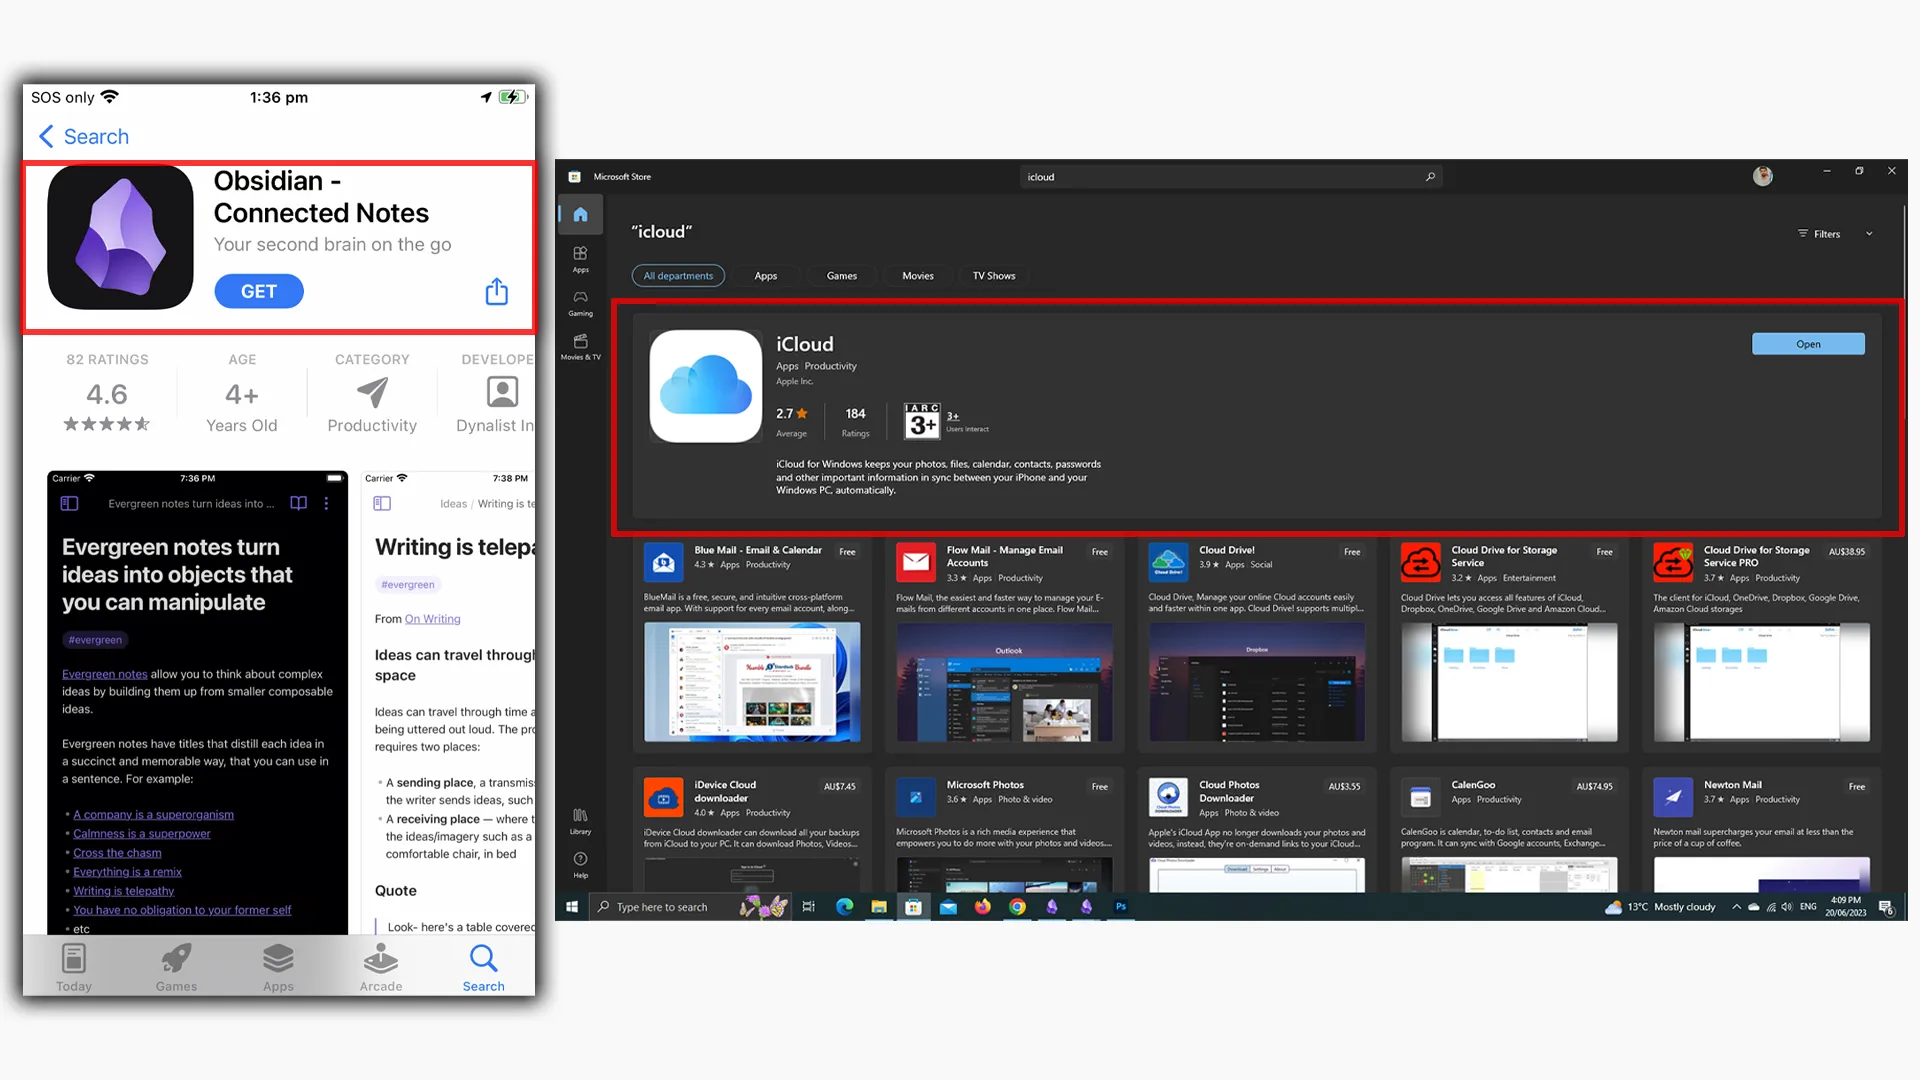
Download the Obsidian app from App Store and iCloud app from Microsoft Store.
Step 02
Click on the “Apply” button to complete the iCloud desktop setup on your computer. You will see an iCloud option in the file explorer navigation panel.
Step 03
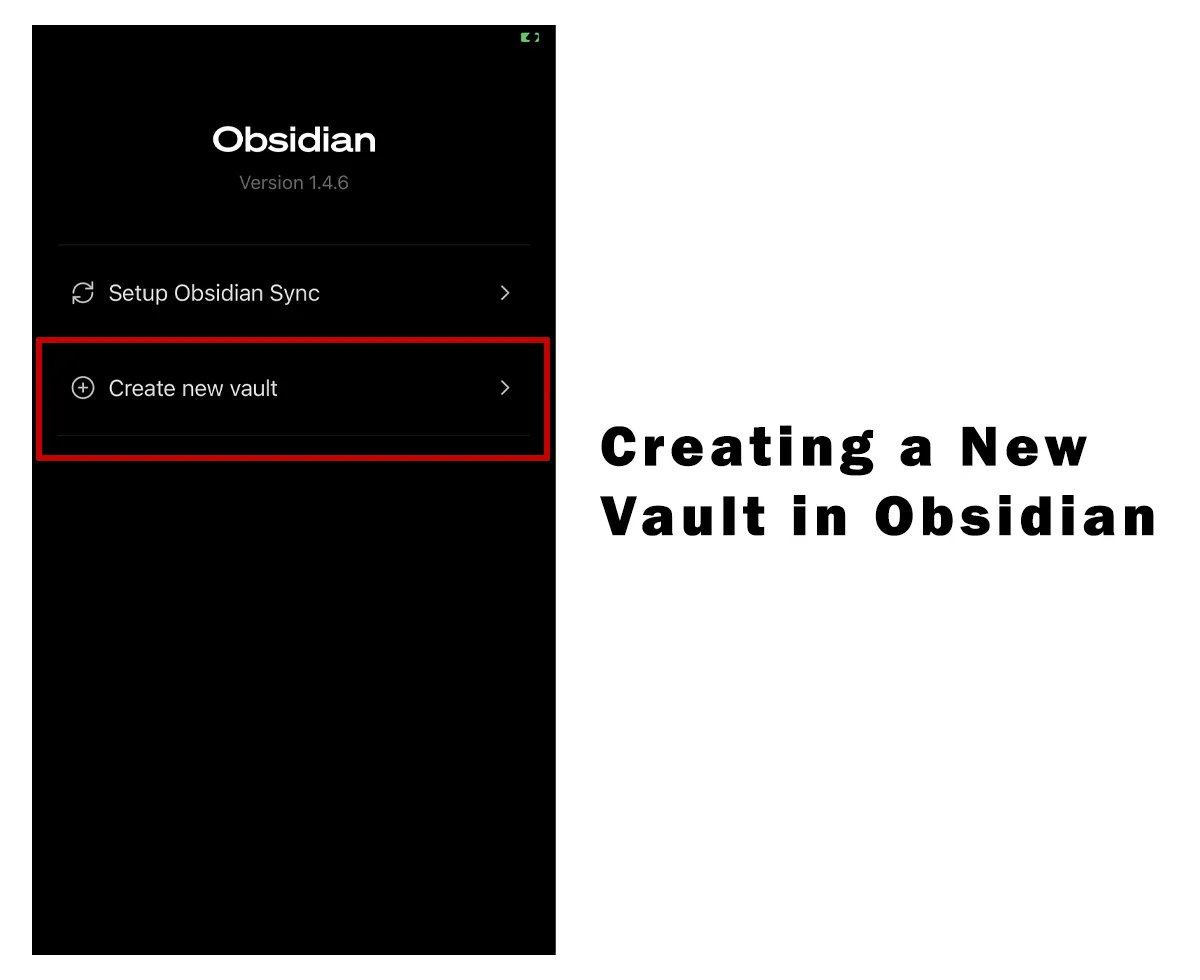
Open the Obsidian app on your iPhone/iPad and click “Create new vault.”
Step 04
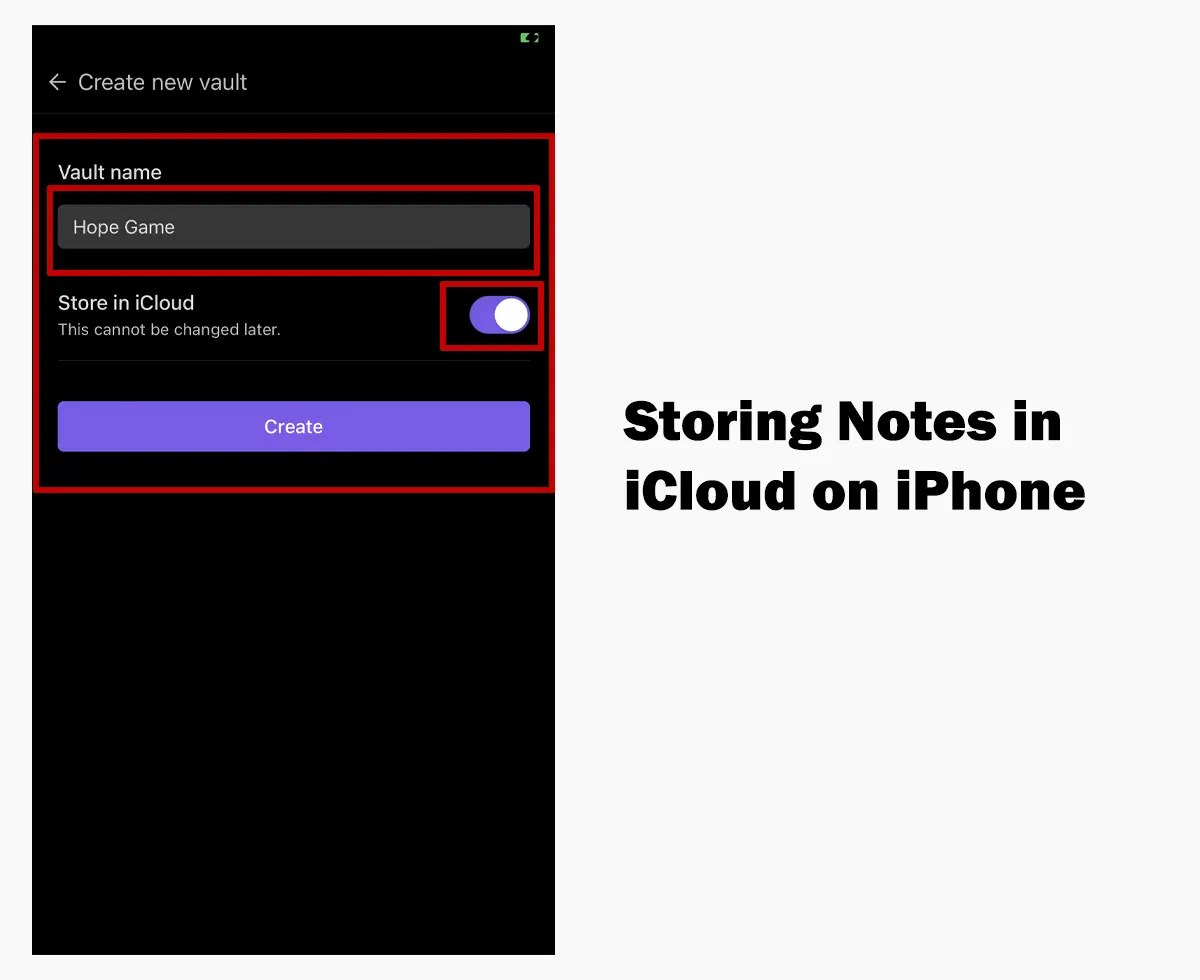
Give the vault a name and ensure to check “Store in iCloud.”
Step 05
Add and edit notes on iOS. The app should automatically sync notes to the cloud.
Step 06

Open Obsidian on Windows and click the “open another vault” button.
Step 07
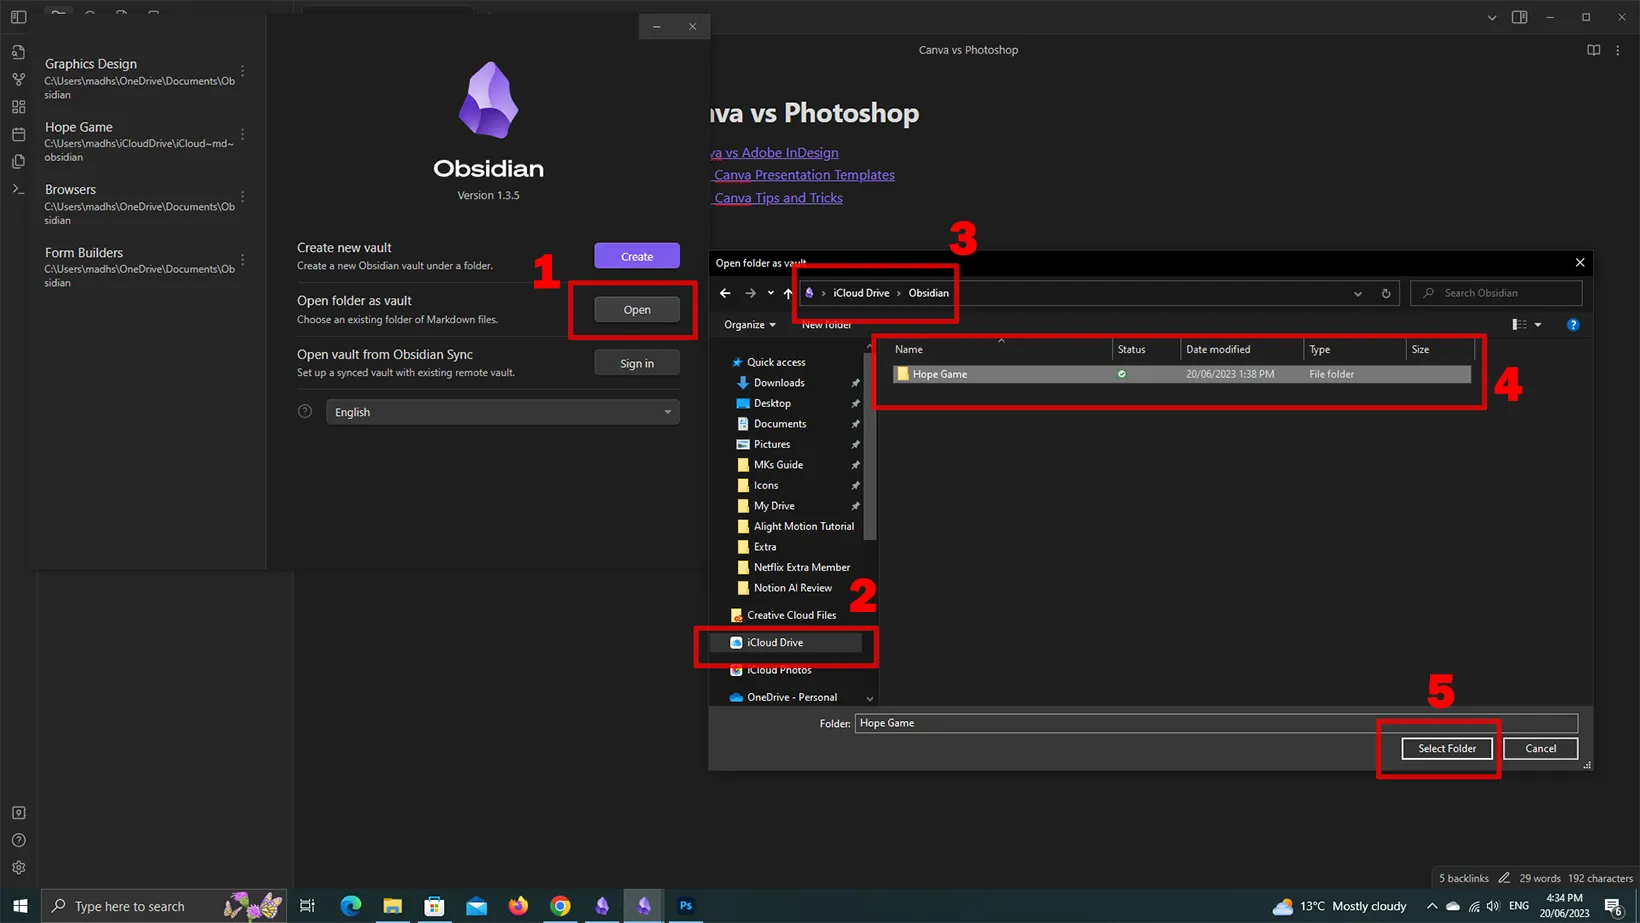
Choose the project folder inside the “Obsidian” folder in iCloud Drive. It will take a moment to download the files.
Obsidian will open when the download is finished. Now, changing something on this platform will change on the other.
Windows PC and Android (7 steps)
Syncing an Obsidian computer with Android is slightly complicated, but only for the first time. We need an additional app called FolderSync to complete the process.
The FolderSync app syncs folders between your cloud storage drive and your phone.
Step 01
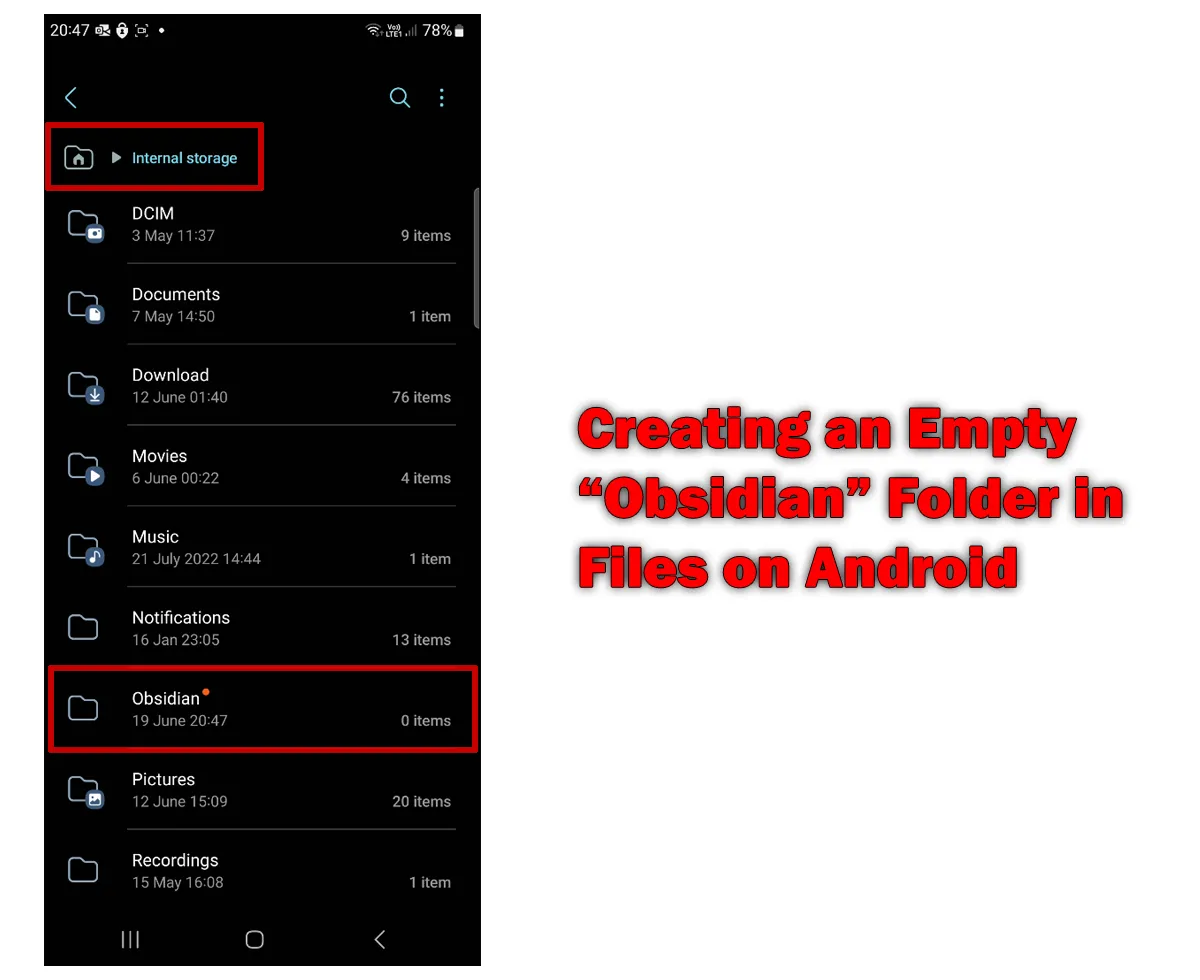
Download the Obsidian Android app. Create a folder titled “Obsidian” in your files. You can set the folder name to whatever you want (skip this step if you already have the folder and projects inside).
Step 02
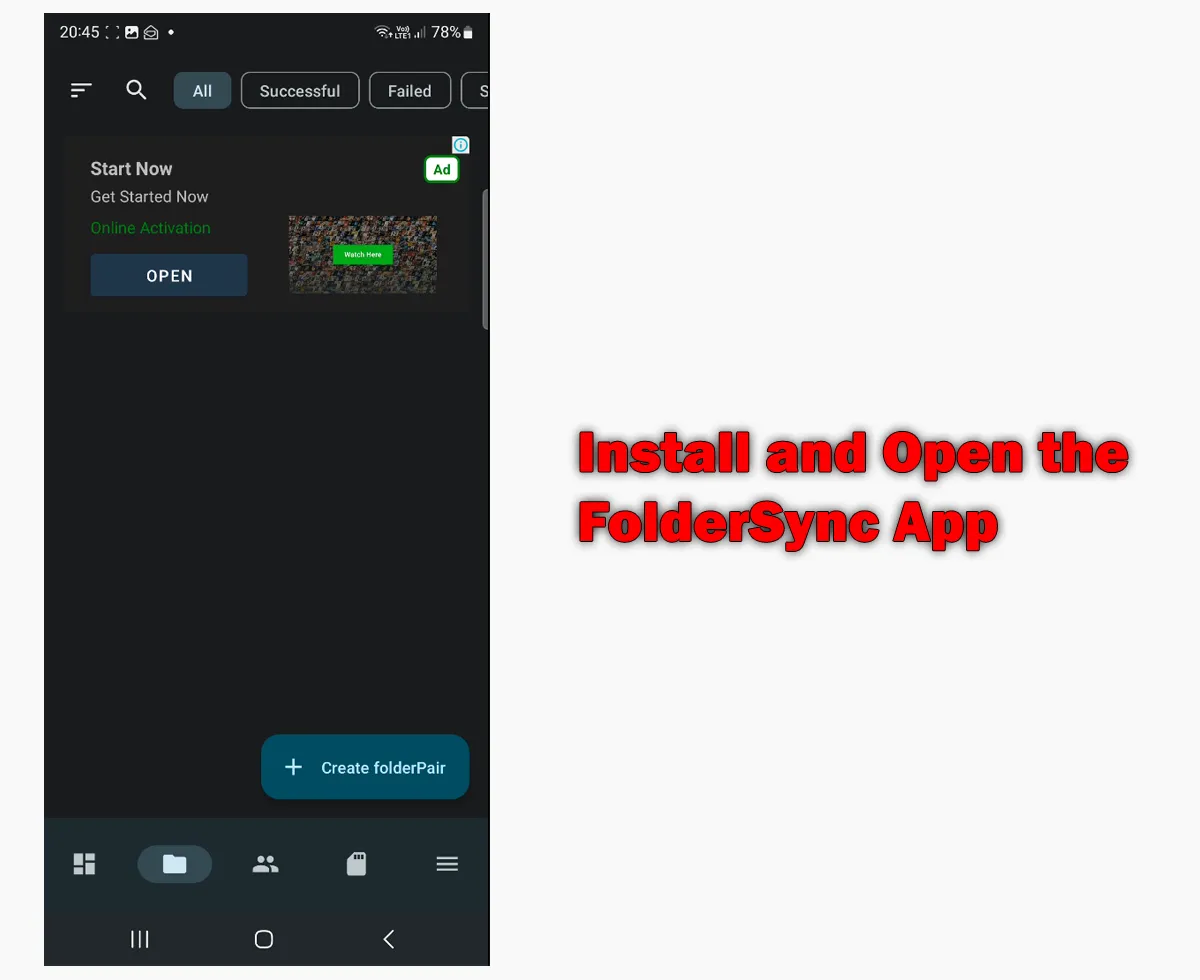
Download the FolderSync app on your Android device. Accept the terms and conditions and permissions.
The app requires file and notification permissions. You can also disable battery optimization to sync in the background.
Step 03
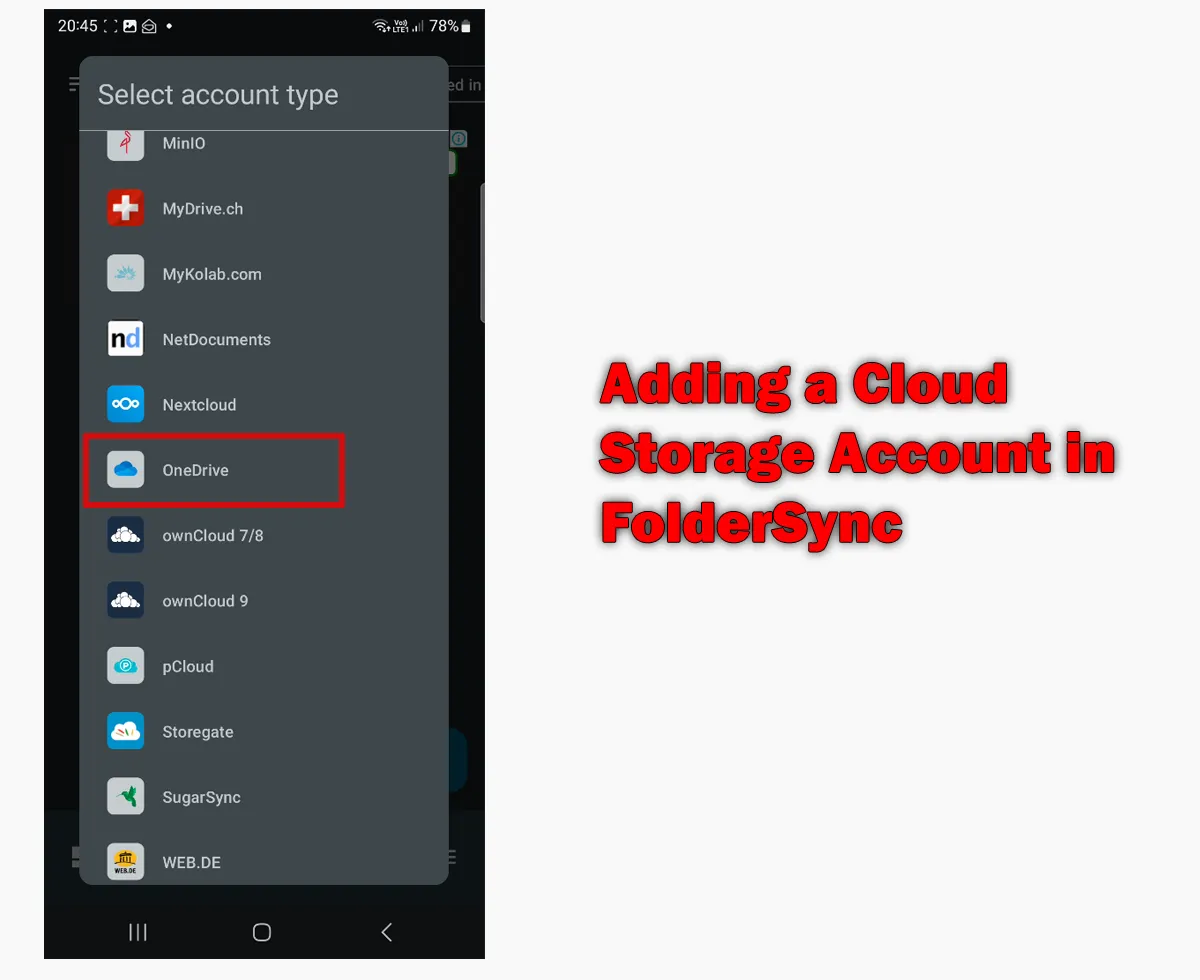
Go to the third tab in the app to add a cloud storage account. Choose your cloud storage service. I will choose OneDrive.
Step 04
The next screen will ask you to sign in to your cloud storage website. For example, for OneDrive, I will sign in with my Microsoft account. For Dropbox, you will sign in to your Dropbox account.
Step 05
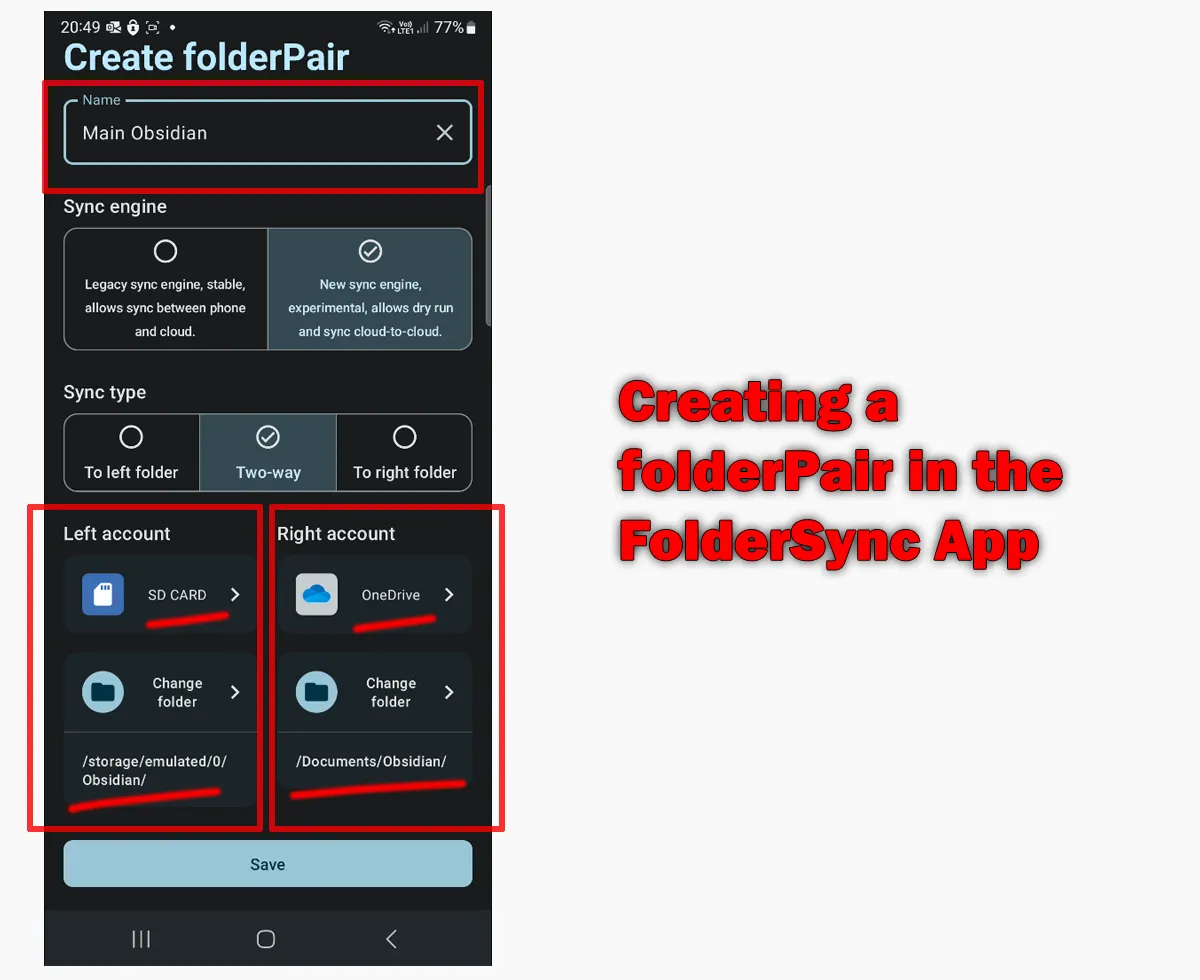
Next is adding a folder pair. On the main interface, click on the “Create folderPair” option.
On this screen, give this pair a name. Leave the sync engine and sync type options as they appear. We must focus on the left account and the proper account options below.
From the “Left account,” tap on “Select folder.” Then, choose the empty “Obsidian” folder from your phone.
Tap on “Select folder” from the “Right account.” Choose the folder where Obsidian projects are saved. After opening the folder, tap on “Select” to choose it.
Step 06
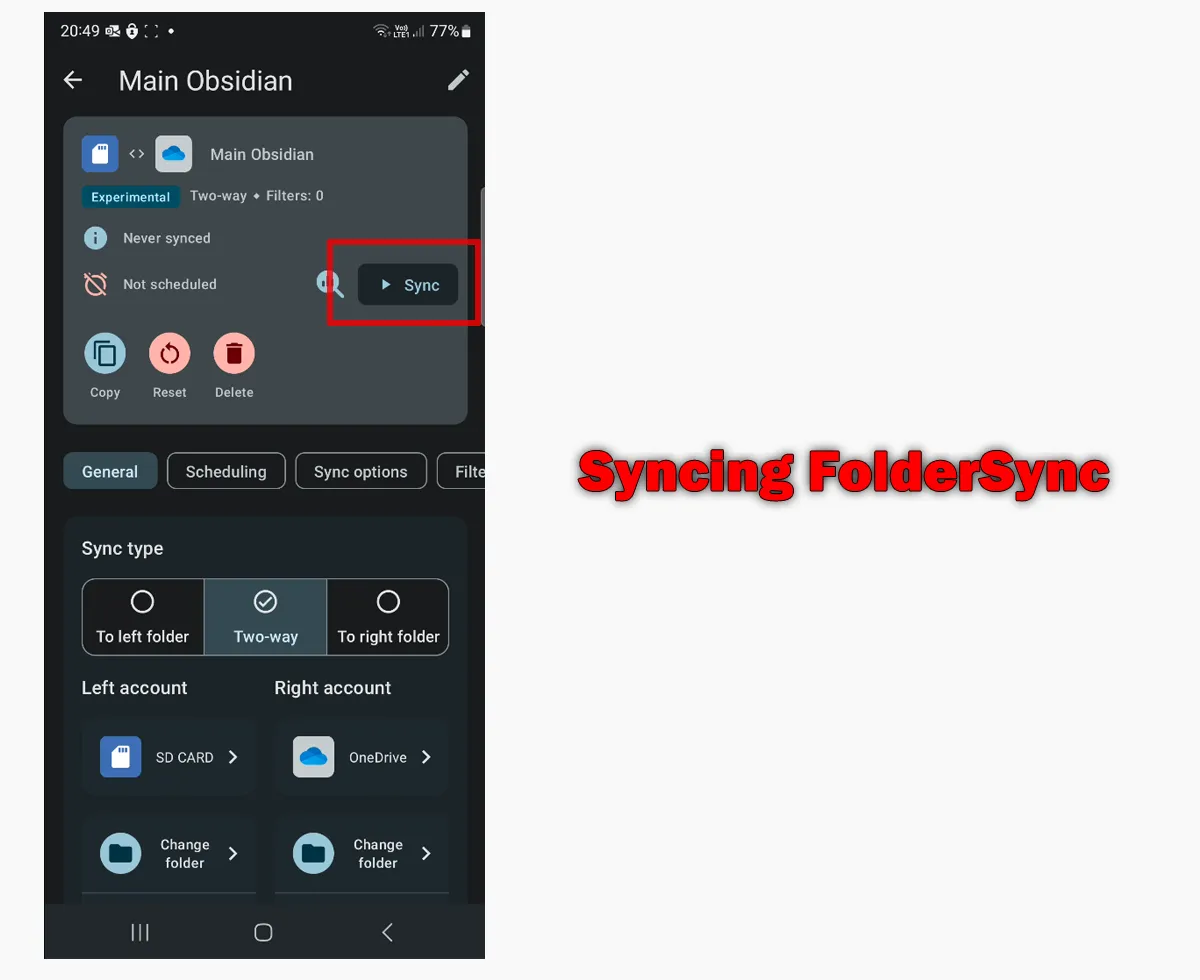
After saving this folder pair, click on “Sync.” Tap on the second Sync files option to sync the folder now. This will use your mobile data if not connected to Wi-Fi.
Step 07
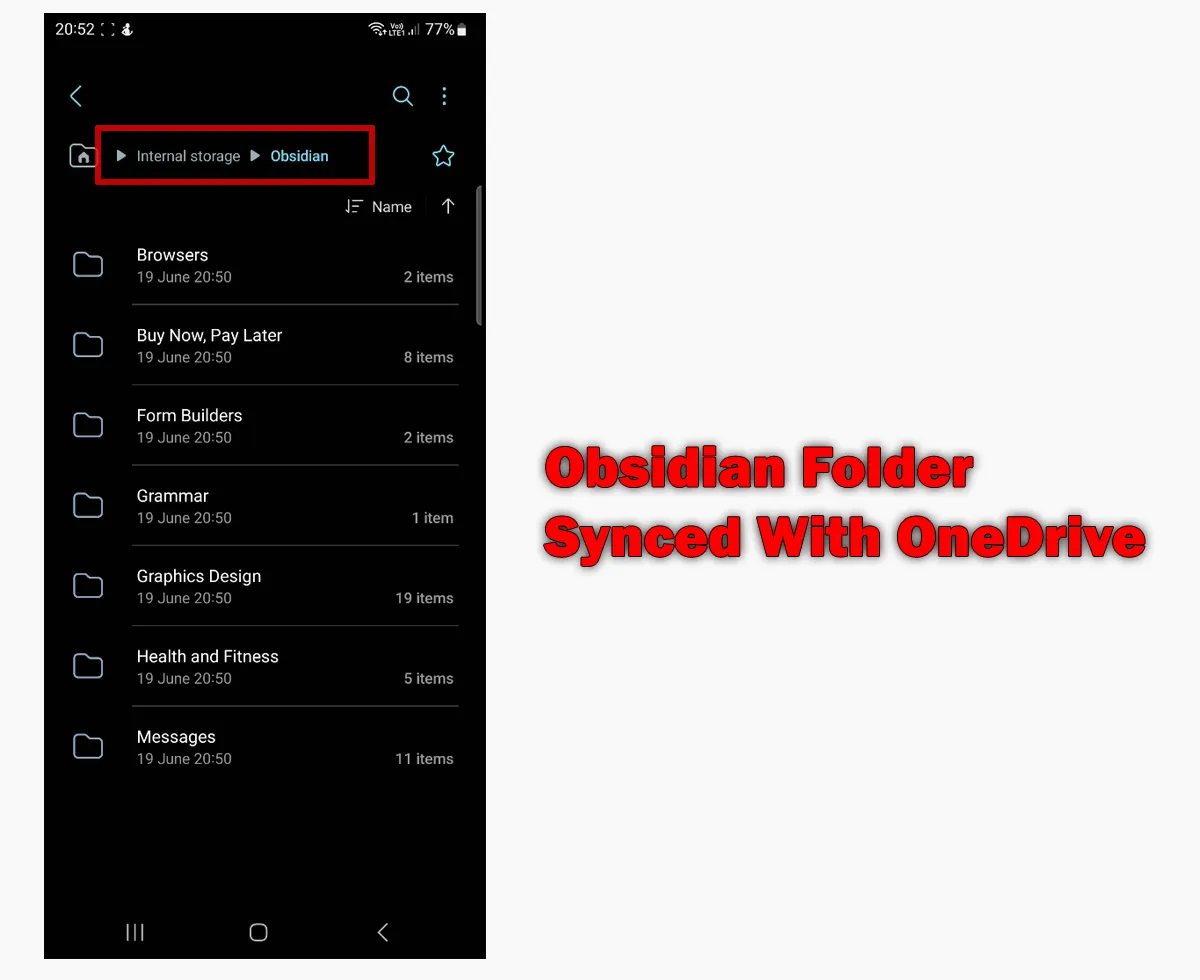
Once the sync is complete, you will find your projects in the Obsidian folder on your phone. Now, if you edit a note on one device, you will find the edits on the other.
You must sync the files in the FolderSync app every time you make changes. You can enable the sync schedule to auto-sync files.
Before you go: Best Obsidian Plugins
Summary
Syncing Obsidian only takes a one-time setup. Depending on the device, you need software packages.
However, if you want to sync Obsidian across devices without the hassle of third-party programs, Obsidian Sync is the best option. Thanks for reading. Please let me know if you need any help.
Madhsudhan Khemchandani has a bachelor’s degree in Software Engineering (Honours). He has been writing articles on apps and software for over five years. He has also made over 200 videos on his YouTube channel. Read more about him on the about page.
